520 838 0346
 sales@zinatt.com
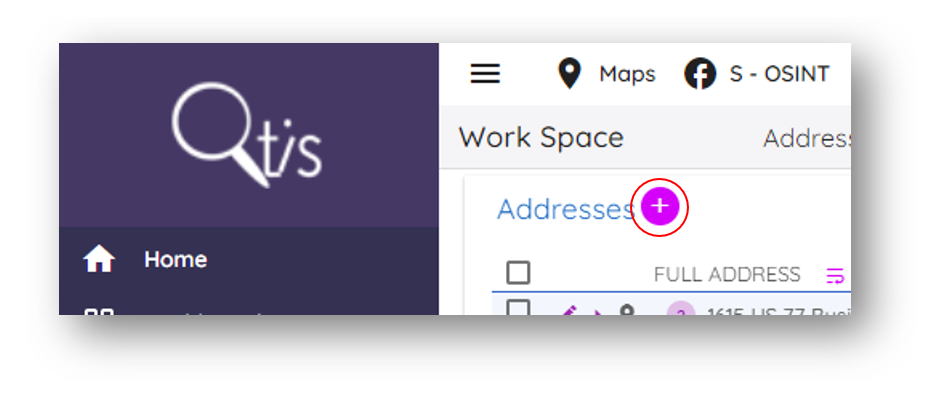
How do I start adding data into Qtis?
1. Open the Form (left panel on your screen) where you want to store your data.
2. Click on the ‘+’ located to the right of the form name.
3. Click ‘Save’ when done to save your data.
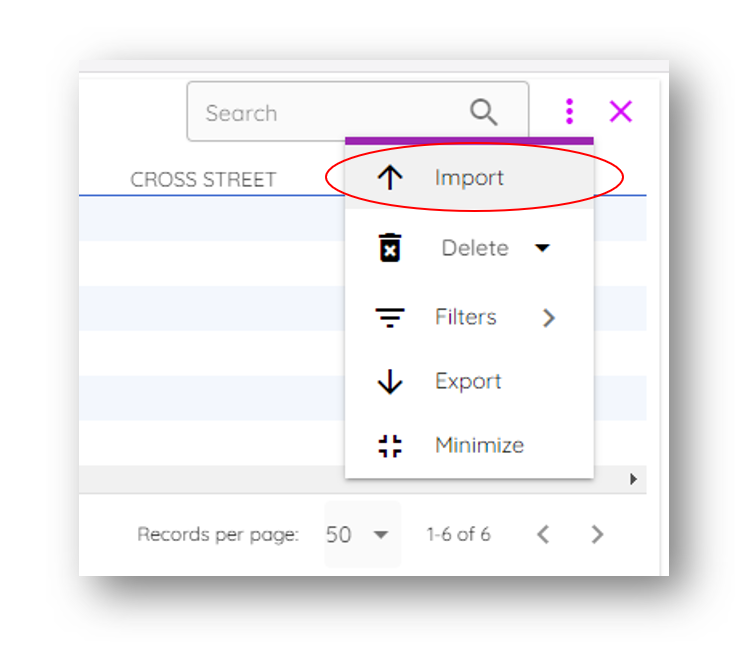
Where do I go to upload data from CSV file?
1. Open the form where you want to upload data.
2. Click on three dots on upper right corner of your window.
3. Select ‘Import’.
4. Find your file you want to import.

How can I connect related data points?
At the bottom of every record screen you will see the link analysis screen.
1. Click on ‘Add Connection’.
2. Locate the data you want to connect by either searching for it or selecting the form from your left panel options.
3. Select the data by clicking on the check box.
4. Click on ‘Add Connection’ at the bottom of your screen to complete the connection.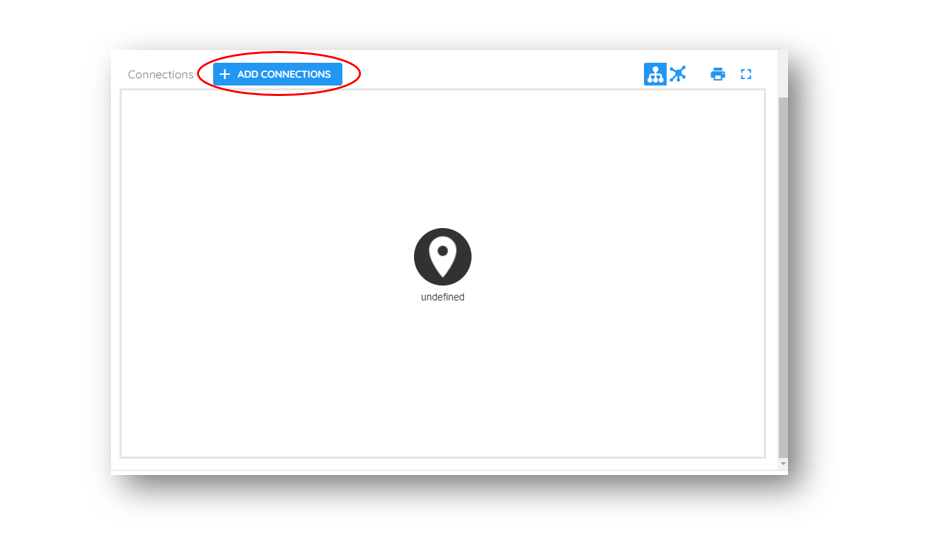
Where do I visualize the data that is connected?
The bottom of every record has a link analysis screen similar to the one displayed below:
1. Scroll to the bottom of your record or form.
2. Click ‘Add Connection’ to start adding connections.
How does drill down work?
When data points are connected users will see a purple bubble displayed to the left of the data on the grid display. 
Users can drill down and explore those connected data points by clicking on the bubble and clicking on data points they want to explore.
What types of files are supported by Qtis file upload?
ALL data types are supported on our Qtis platform.
If for any reason a file type cannot be viewed with your application be sure to check that the device you’re using supports that file type.
Example: if you are trying to view a PDF and your device does not have Acrobat Reader the file will not open.
How can I edit my records?
Every record has a pencil to the left of the information; click on this pencil to edit the record.
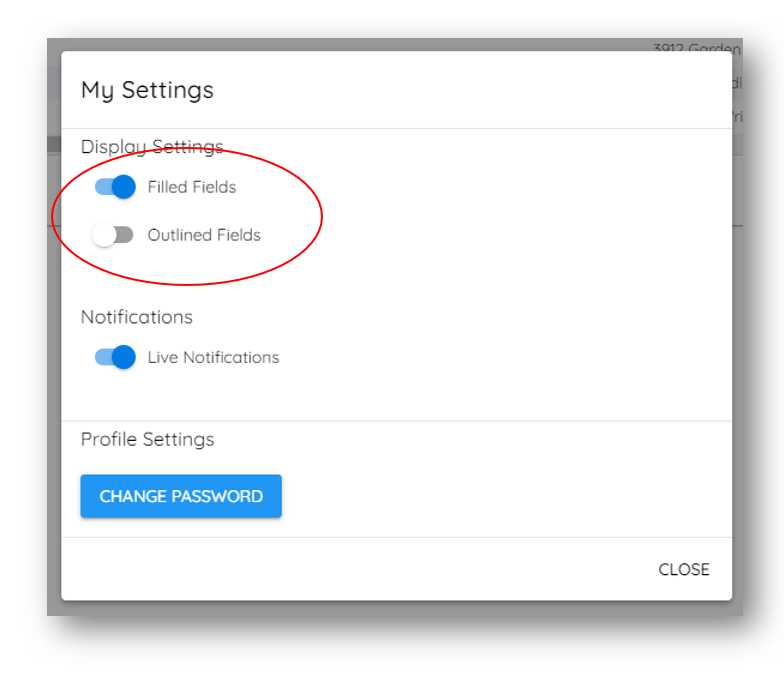
Can I change the view of my forms?
1. Upper right corner of your application you will see ‘My Settings’.
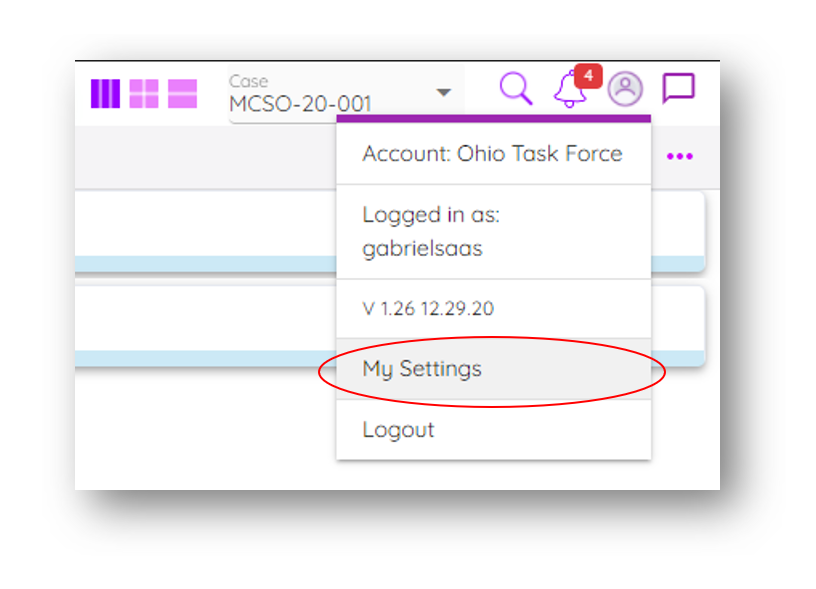
2. Switch the toggle to change the display of your forms.
How can I hide my forms on the left panel?
1. Go to your ‘Administrator’ tab on the left panel.
2. Click on Roles ‘Management’.
3. Select the Role you want to manage forms for by clicking on the pencil.
4. Now you can set restrictions on what that role is allowed to View, Create, Edit, Delete or Import.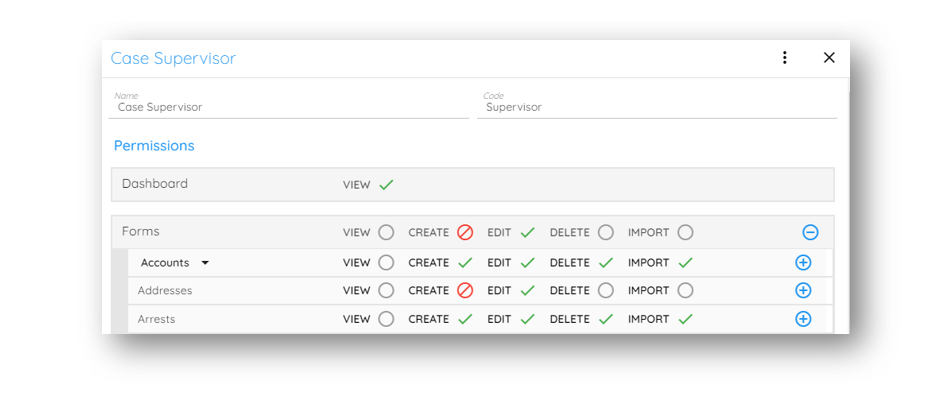
Grey Circle – Soft Restriction (This setting won’t override other permissions for other cases)
Red Circle – Hard Restriction (This setting over rides any other roles this user has assigned)
Green Check Mark – No Restriction (This setting will allow user this action with no restrictions)
Why can’t I see my case on the Case drop down?
1. Go to the ‘Administrator’ tab on the left panel.
2. Click on ‘Role Assignments’.
3. Select the ‘Case’ the ‘User’ and the ‘Role’.
4. Click on ‘Assign’.
5. Go back to the application and refresh your browser by doing one of the following:
A. Chrome, Firefox, or Edge for Windows: Press Ctrl+F5 (If that doesn’t work, try Shift+F5 or Ctrl+Shift+R).
B. Chrome or Firefox for Mac: Press Shift+Command+R
6. The case will display on the case drop down.
Can I customize my resource items on the top row?

Yes – we can help with this. Give us a call!
Not finding what you’re looking for?
What resources are available to me where I can learn more about Qtis features?
Visit our YouTube Channel we have tutorial videos that will help you! https://youtube.zinatt.com